
It allows to keep PV going, with more focus towards AI, but keeping be one of the few truly independent places.
-
This is the method I use for my GH2 footage, and I thought I'd make a tutorial about it!
-
GREAT tuto @Gardner =) Thanks
Logically you can further attenuate and control this by separating layers in lighten/darken modes and changing opacity. When footage asks me for sharpness I normally also throw in a pinch of micro-contrast: unsharp mask with small amount (15-30) big radius (depends on what you need, between 16-41) and a little bit of threshold
"Needs" a workaround for the find edges filter, in order to use this technique in 16 and specially 32bits mode
Allow me to add a different compatible approach, tuto by Eran Stern, though it's about HDR toning, it also adds also microcontrast
-
Hey, I found a kind of workaround for 16 and 32bits. Instead of "find edges", CC Kernel (for adobe cc) can be used or alternativelly threshold or cartoon, yielding each different results. With the kernel 1,2,1 / 0,0,0 / -1,-2,-1 . I tried Luma matte instead of inverted.
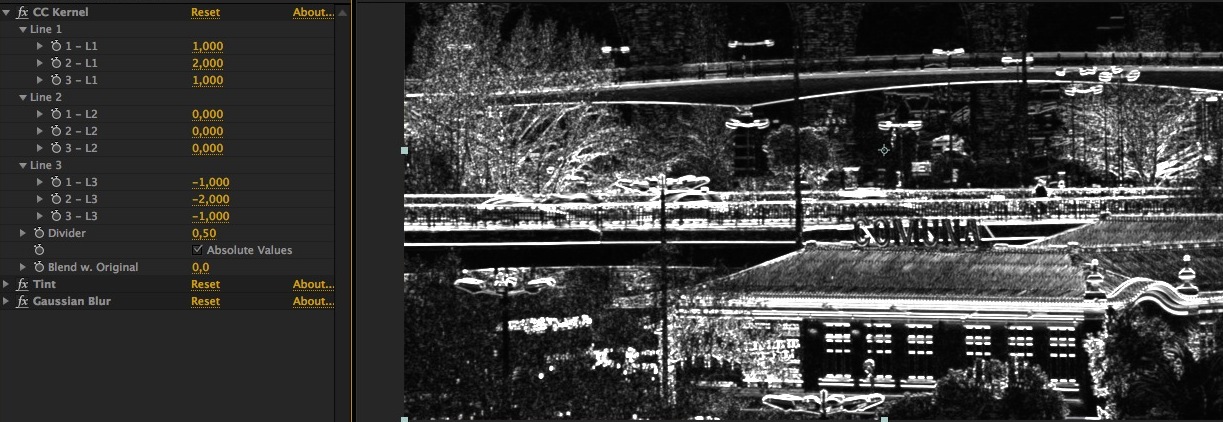

 kernel_mask.jpg1223 x 422 - 175K
 -
@maxr Thanks even though I rambled on for a bit at first :) And yea he's essentially aiming for that contrasty HDR look. I love the microcontrast, and I usually like to use a sharp hack for my GH2 so it will be like a 2 pass sharpen when I sharpen it more in post. Also it is a shame that even with AE CC, the built in plugins still aren't fully compatible with 16 and 32bit color space.
-
@maxr Wow, looks like I'm about to start playing around with some footage now! :) I can't say I've used cc kernal yet, but it looks like it might yield a little more control.
-
@Gardner with the kernel effect the lines are very thin and detailed... I need to play more with it.
Meantime, here's the cartoon option, also with normal Luma matte; works pretty well too :-)I bet it's possible to do frequency filtration too; we would need to find a ps "add image" like 32 bit capable AE pluggin.
If interested, have a look at this video.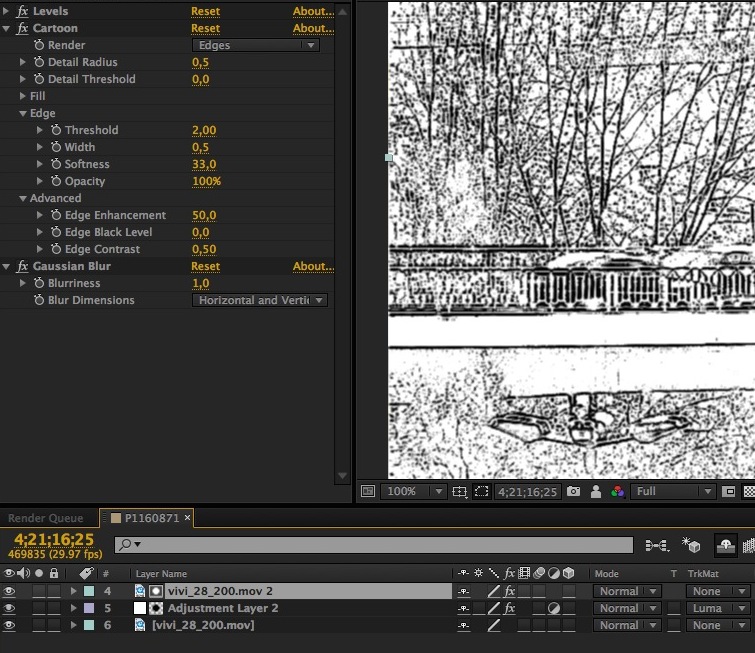
This is a bt squizzo, I'm answering myself.
Anyway Kernel works the best. I did this:Created sequence (SH) with Footage (A).
Then duplicated 2 times that footage; A1 (on top) + A2 (below), precompose those copies (B).
Inside precomp B, put filter gaus blur ratio 2 in A2, set A1 to difference. Pushed Levels in both (individually, not smartass adjustment laWyer)
Back to SH, I duplicated A again (A3) and put over A with the sharpness I want to apply, set layer to Luma matte "B" which is on top.
In precomp B put, in this order, the Kernel CC filter mentioned before, plus Levels, Tint and another gaus blur ratio 2. With levels control what the matte filters black = masked OUT , white = masked IN.
Unchecked visual of precomp B. This is the effect. I still precomped B + A3 (C).Then in master seq (SH) duplicated C two times, and set one to to lighten and the other to darken... changed opacities till reached point of interstellar fusion. That's it, close enough... more testing required, aaaaahhhghg going to zzsslleeeep now

 cartoon-mask.jpg755 x 653 - 146K
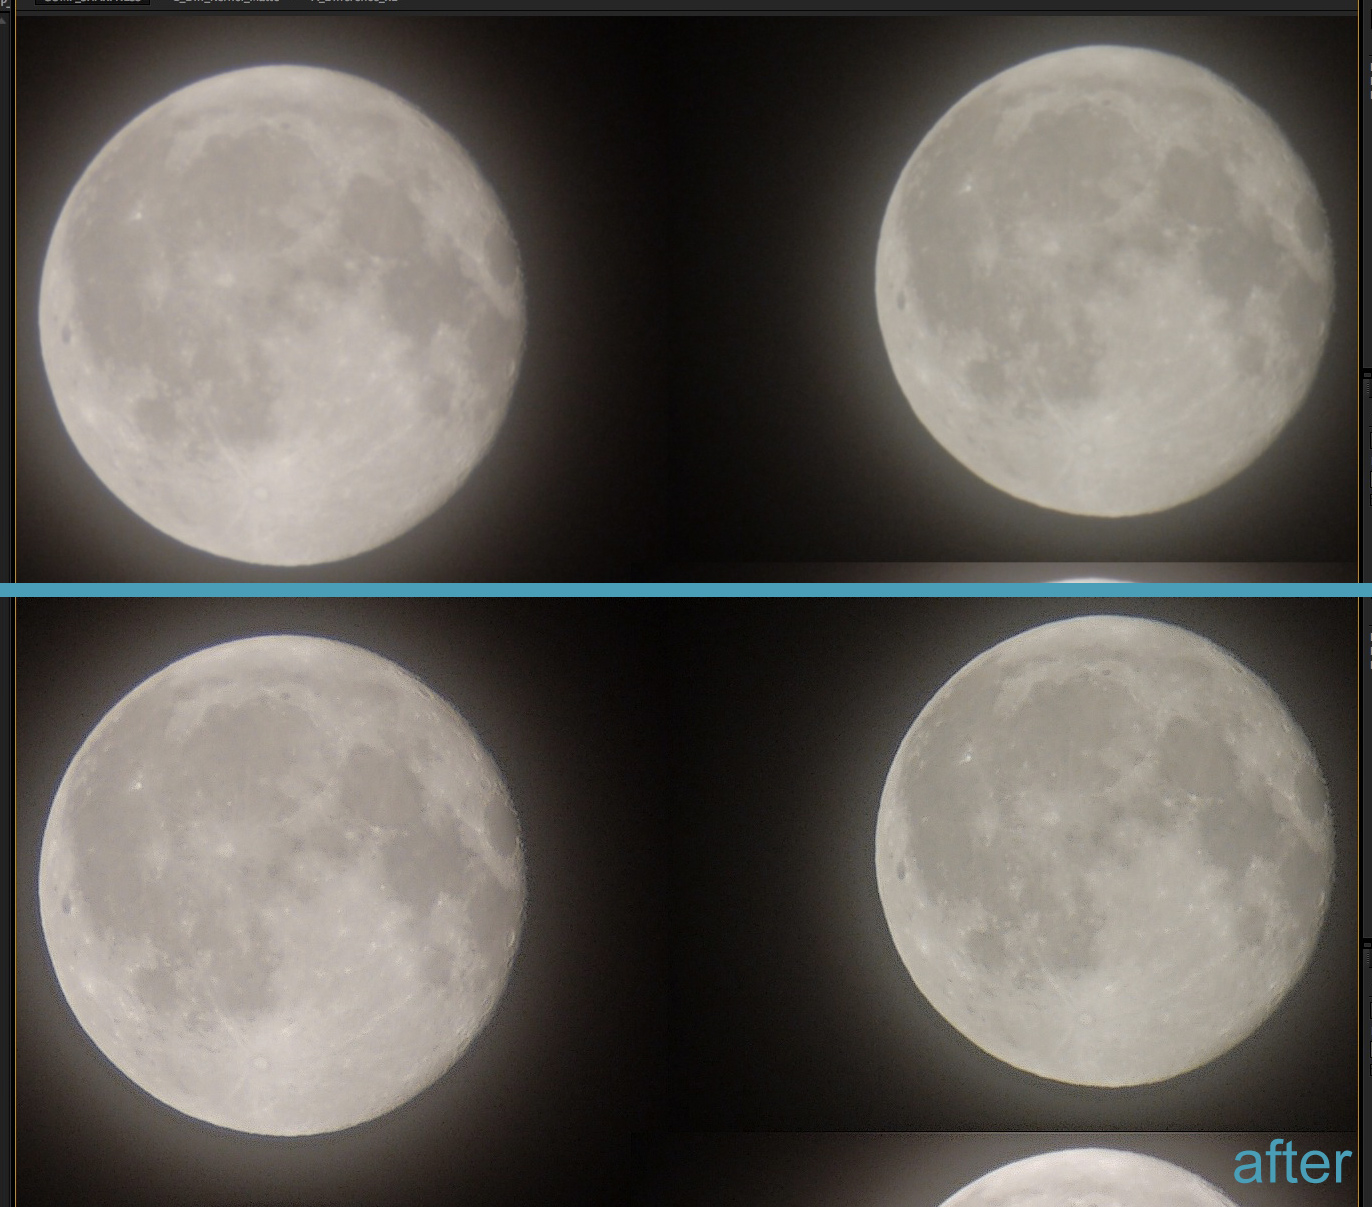
 4M_kernel.jpg1372 x 1207 - 451K
 -
@maxr Yea I just used the cartoon effect and I found it more subtle!
-
Only problem with using Unsharp Mask and normal sharpening kernels is their tendency to give false-edge artifacts at fairly low levels when the feature you're sharpening is brighter than the surrounding pixels. The masking limits sharpening from being applied to macroblock and grain/noise in large flat or continuous tone areas but it doesn't prevent the false-edges from appearing where you do want to sharpen, which you can see all along the edge of the moon.
I've been using a method ported from Photoshop that uses high-pass filtration on a duplicate layer that then uses the Overlay blending mode. It ends up with less edge artifacting than Unsharp Mask but it's still there so I'm still looking for techniques that will eliminate what some folks key in on as "over sharpening".
Interesting stuff in this thread though. Perhaps an additional mask based on luminance is worth some experimentation, since small dark features can withstand and benefit from much higher levels of sharpening than can brighter edges.
http://www.mediafire.com/download/pp37kt6s9496log/HighPass.ffx
...that's set up to work in a linear light workspace. I believe deactivating the last effect in the stack should make it work outside linear light.
-
Quick and dirty video test using method described above (Kernel mask / difference), moon wasn't really good example and I was too tired. In this, lighter sharp layer was about 33% and darker about 55%.
Personaly, as I would like to add my own grain recipe to final grade, being able to sharp footage not introducing further grain/noise would be very nice.
Issues to overcome are substituting gaussian blur for something that repeats or feathers pixels on the edge of frame AND simplifying most possible in order for the whole process to be less processor intensive and quicker.
Please, have in mind this footage is not from GH2, but from a 1/2.3'' sensor P&S camera 8-)
@Gardner dunno if more subtle, easy to tame 4 sure... the threshold one is too harsh. Would be nice if someone who actually knows about kernel could refine the filter, fiiu fiuui fuuu {whistling}
@BurnetRhoades For photography, back then when I was using PS intensively I even developed many heterodox recipes and actions for sharpening, now I don't even remember where I left my girlfriend :P.
High pass is a nice one as one can play around with blend modes (soft light is very popular) while filtering results with a mask. Also can be mixed with high frequency and alpha channel methods. That's what Jeremiah (@Gardner) is doing.I downloaded your file, will be playing with it... When I feel more solid about this K_method - have to closely pay attention to this "tendency to give false-edge artifacts at fairly low levels when the feature you're sharpening is brighter than the surrounding pixels" you mentioned - I'll post a file too. Thanks for input bro =)
-
@maxr I believe fast blur repeats edge pixels.
-
@maxr one of the other things I've done in that preset is append a Curves effect to the tail end with a bump in the highlight area, pinning mids and lows, which has the effect of accentuating the highlights and making them "pop" more, an additional effect to sharpening since this method has the net effect of a very controlled S-curve accentuating values near black and white and leaving mids alone.
I'll also double up this layer, using one copy with a small value, 6 or less, to bring out highlight and small black detail and then a second copy with a larger value, like 50+ which has an almost HDR effect. I saw similar methods being used by Photoshop folks looking to emulate the look of David Hill and Dragan photography. Mostly folks over do it but it can look pretty slick if you're careful with it.
I like to work in linear light so some methodologies don't port without a lot of fuss because they're designed for blending modes that work best in the confines of legacy color spaces.
-
@Gardner yes it works. Added to Frankensharpen project file :P • LINK below
Box blur works the best 'cause you can really further control edges with itinerations... but one would need 3 lives or Deep Blue =)@BurnetRhoades in the video above (vimeo), Eran also explores the HDR toning; if you tweak his base settings you get microcontrast allright. I used it in a couple of P&S videos see x3 Pato Selvagem
Been playing with your ffx file, man you managed to perfectly replicate the highass procedure :-)
The compound CC filter only works in 16bits mode though. Have a look at what I've done so far... well mostly it's actually @Gardner 's work, je je, I just tweaked it -
I can't take full credit for the conversion, I found another bloke who was needing it for something else he was doing and he set up a tutorial. I think I added the bit that made it work in linear-light mode though. I've had to do that for other effects, like my favorite preset that mimics cross-processing. ColorGHear has a few cross-process looks but I still like this one I got from another Photoshop tutorial better than anything else I've seen.
Its true, one of the filters only works in 16bit but I figure it's not being terribly bad, especially with AVCHD, plus how I tend to use it, depending on what I'm doing, is I'll only apply this to the luminance of the image. That's all you really want affected by sharpening anyhow. My luma will generally be less manipulated than color so there shouldn't be any degradation here starting with 8bit/10bit sources I'd expect.
My color manipulations will be coming through in another clip above these layers and then layed back down with the Color blending mode, mimicking how something like DaVinci lets you manipulate the luma and color of your footage independently, preventing unnecessary cross-talk or contamination. That way you can do things like enhance saturation without affecting the gamma of the image, etc.
I'm still using CC-CS6 for another month or two so I couldn't open the project file.
-
Looks like we've cooked up the perfect formula now in this discussion! I'm gonna have to figure out how to make a preset now to save the settings so I won't have to go through all the steps the next time.
-
This thread remembered a video that I saw some time ago; I've managed to find it, and the guy used a similar technique of yours, but adding more unsharp masks with different settings.
Don't know if David is here in PV to talk about it.
-
Yep, sharpen for clarity.
-
@MarcioK nice! Though the guy doesn't really show the whole shebang going on behind the curtains ,-)
Because differences in how techniques are builded, I've chosen to "equalize" the kernel part to match HP.
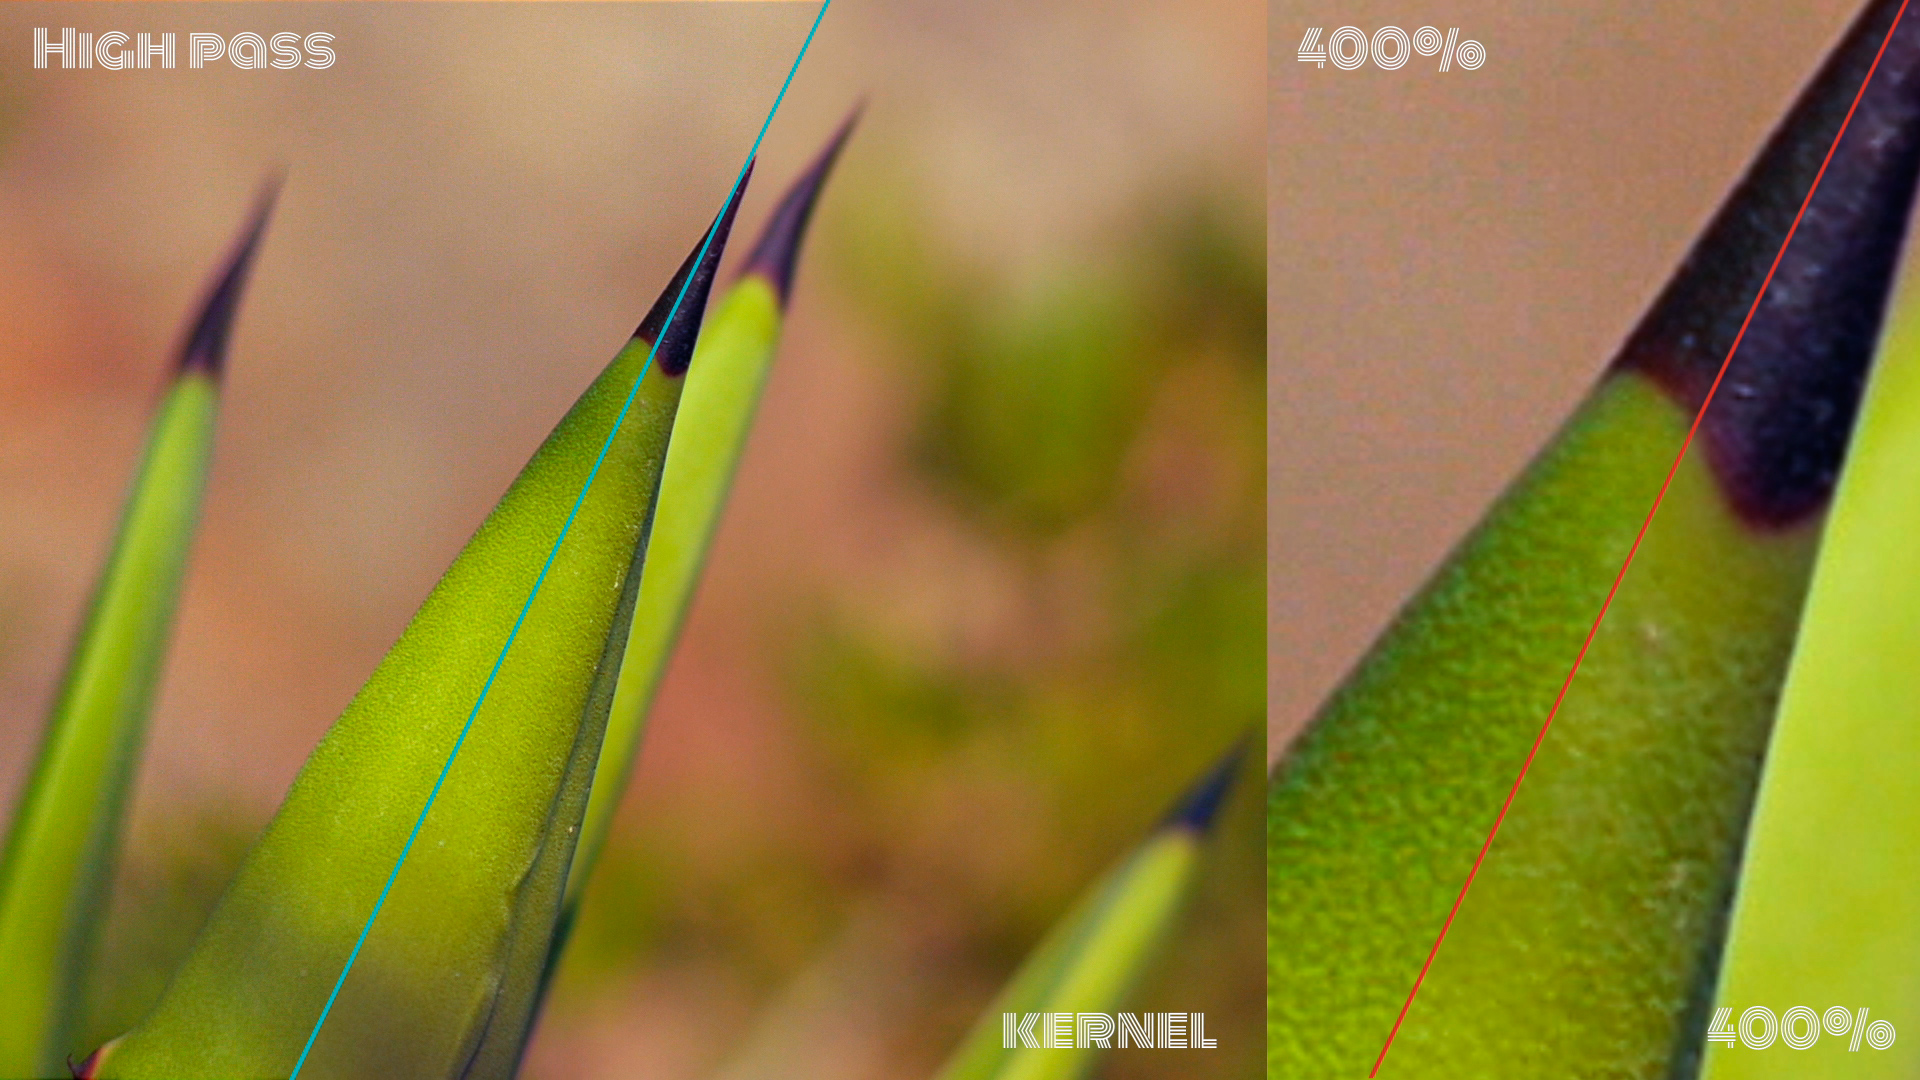
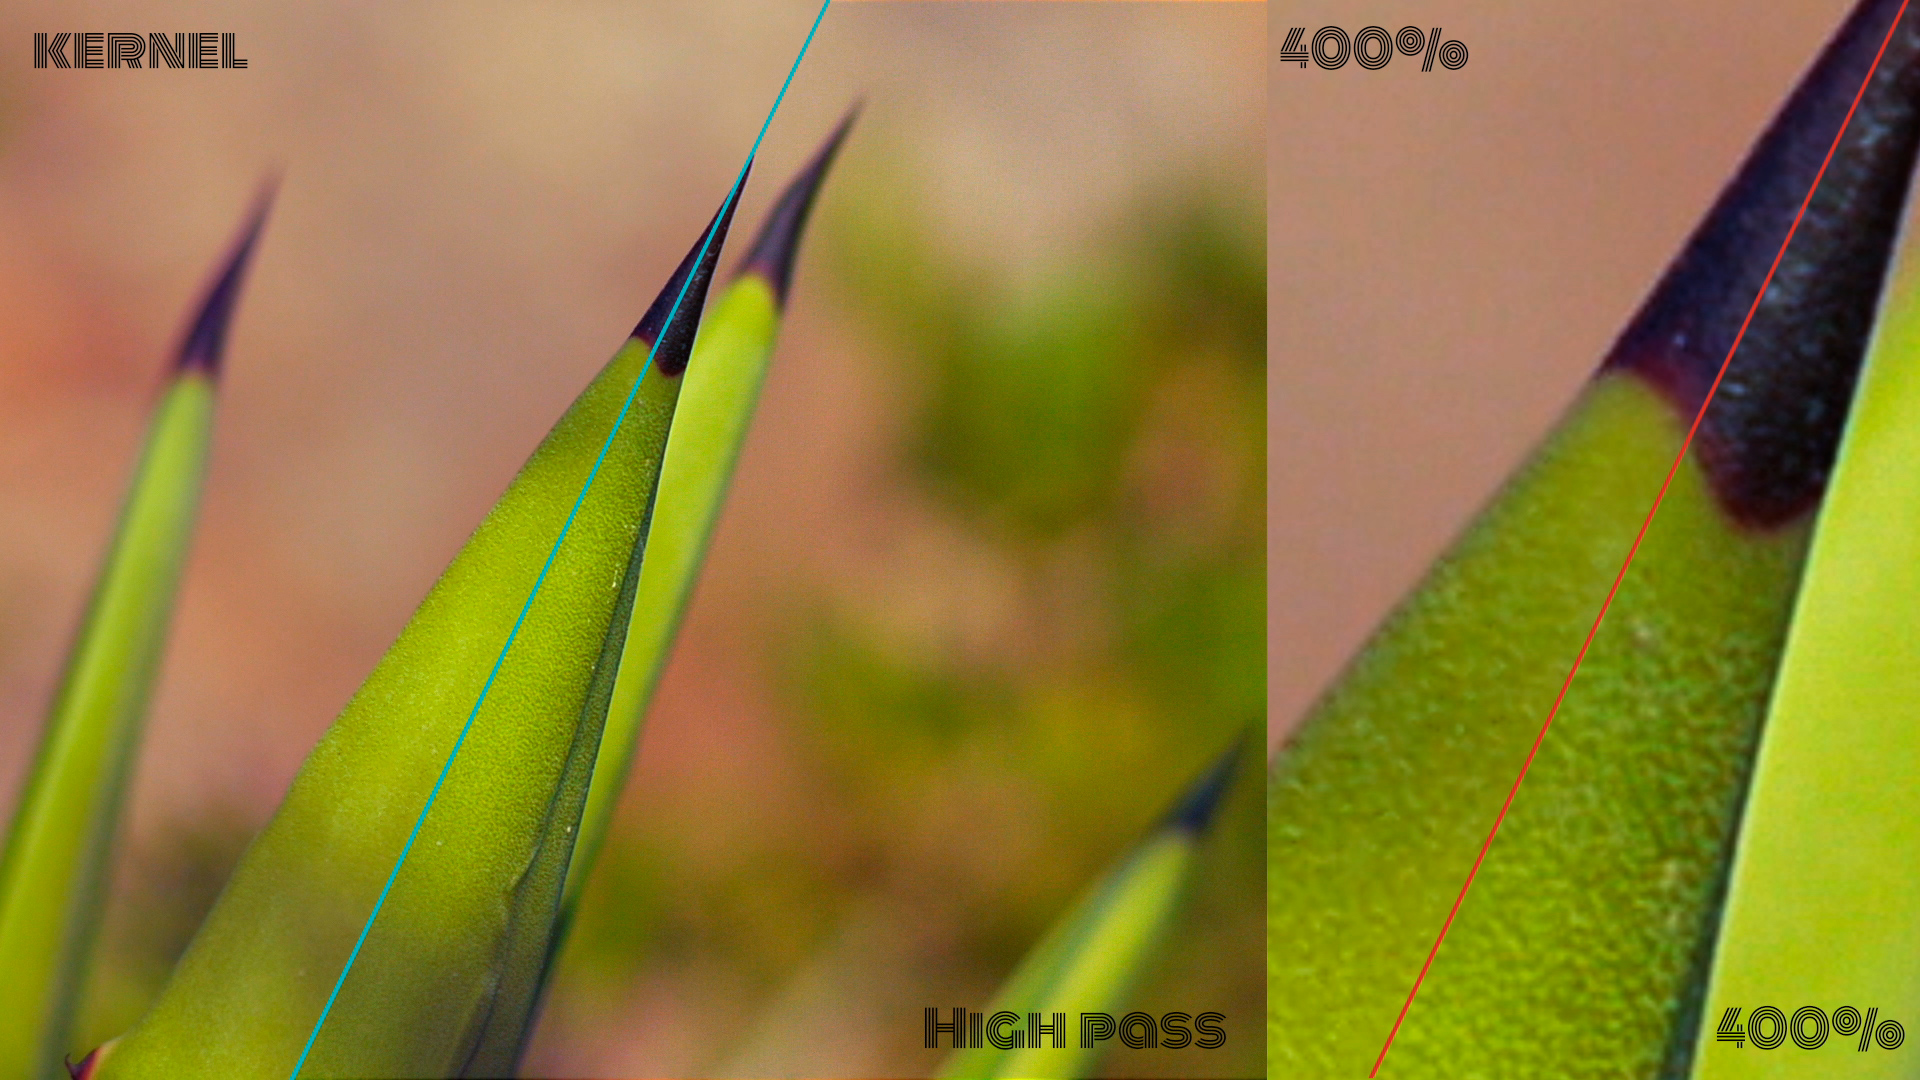
No added grain after sharpening, camera GH3, -5-2-5-5, lens vivi 28-200 f3.5-5.3As long as you tweak first box blur, levels and fast blur settings, the kernel method seems good to me IF it could be turned lighter on processing... or you have a powerful render workstation that chews whale bones for breakfast :P • As you can see below, lighten layer was set to 55% and darken to 77%. Also in the frame grab you can check how less noisier kernel is (normal as it masks), of course it is a still, you'll notice less of the grain in motion, but still
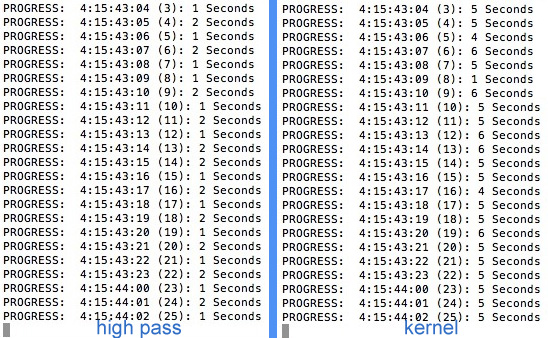
BurnetRhoades' high pass approach is very coherent and much more efficient,
like 4 times faster render, see below, more than good for most uses =)Finally as an alternative to youtube grinding machine - despite proRes upload - I'll leave a copy (audio it's no good though)
in x264 FHD, case anyone wants to download it - sharp campari x264


 AE_schq.jpg2288 x 752 - 419K
 AErender_grab.jpg548 x 338 - 141K
 campa_grab_1.jpg1920 x 1080 - 890K
 campa_grab_2.jpg1920 x 1080 - 892K
 -
Neat!
Howdy, Stranger!
It looks like you're new here. If you want to get involved, click one of these buttons!
Categories
- Topics List23,979
- Blog5,725
- General and News1,352
- Hacks and Patches1,153
- ↳ Top Settings33
- ↳ Beginners255
- ↳ Archives402
- ↳ Hacks News and Development56
- Cameras2,362
- ↳ Panasonic991
- ↳ Canon118
- ↳ Sony156
- ↳ Nikon96
- ↳ Pentax and Samsung70
- ↳ Olympus and Fujifilm100
- ↳ Compacts and Camcorders300
- ↳ Smartphones for video97
- ↳ Pro Video Cameras191
- ↳ BlackMagic and other raw cameras116
- Skill1,961
- ↳ Business and distribution66
- ↳ Preparation, scripts and legal38
- ↳ Art149
- ↳ Import, Convert, Exporting291
- ↳ Editors191
- ↳ Effects and stunts115
- ↳ Color grading197
- ↳ Sound and Music280
- ↳ Lighting96
- ↳ Software and storage tips267
- Gear5,414
- ↳ Filters, Adapters, Matte boxes344
- ↳ Lenses1,579
- ↳ Follow focus and gears93
- ↳ Sound498
- ↳ Lighting gear314
- ↳ Camera movement230
- ↳ Gimbals and copters302
- ↳ Rigs and related stuff272
- ↳ Power solutions83
- ↳ Monitors and viewfinders339
- ↳ Tripods and fluid heads139
- ↳ Storage286
- ↳ Computers and studio gear560
- ↳ VR and 3D248
- Showcase1,859
- Marketplace2,834
- Offtopic1,319


